Showing posts with label Bright Ideas. Show all posts

Saturday, August 16, 2014

Bright Idea: Taming Cords


No tangled cords, everything has a place, all devices can charge.

I am so excited this year to have 7 Chromebooks to use in my classroom (waiting for the 7th to arrive that was recently funded through Donors Choose).  Having at least a small group set will mean that we'll be able to use them throughout the day.  I wanted them to be set up in a specific location and have the cords at hand so they can be always charging or, if they need to be moved, plugged in as soon as they are returned to their spot.  There are many great ideas around for taming all your cords for classroom devices.  This is what I came up with that is going to work great for me and my classroom set up.

Place adhesive velcro to the cord box. 

Take the paper backing off the opposite velcro and attach to the base so that they are lined up. My shapes didn't match, I just used what I had left over from other projects.  It worked just fine. 

Place the box to the underside of the table where you desire. 

Do the same process with a power strip.  It will need a bit more velcro. 

The view from under the table with attached cords. You could certainly pull up all the hanging cords with some twist-ties or zip ties to tidy it all up a bit more. 


Thanks to Shelley for organizing this monthly link up.  Be sure to check out the many other Bright Ideas by clicking the links below. 


If you liked this idea, ensure that you don't miss any other post by following me at any of the social media links the top of the blog. 


Saturday, May 17, 2014

Easily Labeling and Organizing Classroom Books

My last Bright Ideas post was all about using labels in the classroom with a focus on using the clear, plastic coated labels for labeling your room.  Since they are plastic, they don't leave behind a sticky, papery mess when you remove them from your cupboards and shelves.  Today, I'm sharing how I use labels for organizing my classroom books.


I have a few different versions I use, pictured below, but basically I print out a few sheets of each and have them ready for when my book orders arrive.  I format the labels so that each label can be cut in half to get two book labels from each standard size mailing label.  Hopefully you can see how they are cut in the pictures.


For books going into my class library, the labels are just printed with my name.  I cut down the rows of labels, leaving the top in tact so they don't all fall apart.  When it's time to label a book, I simply remove a square, attach to the cover of the book and then refer to my library topic list.  I write in the category number that corresponds to the book genre.  For example, all of my realistic fiction books are numbered with 11.


For books going into my small group collections for guided reading and literature circles, I have labels that include my name, indication that it is a small group set, and then numbers stating that particular book number and how many are in the set.  I usually get 10 books of a title for my small group sets.  I have anywhere from 6-8 in these groups usually.  That leaves one that I designate as the teacher book for me to record my notes and write in and an extra for just in case.


Finally, I label my class set novels.  These are done in a similar fashion as my small group sets, just labled as a class set.  I like to have 35 for a class set.  My largest class size has been 33, this last year, so 35 gives everyone their own copy, ans extra and a teacher copy.  If, heaven forbid, I should have a class size larger than 34, some would just have to share.

With each book numbered for the small group and class sets of books, I can assign each student a book.  This helps with responsibility placed on the students to respect the books and helps me know who to charge or give a consequence to for damage to books.

I hope this will be helpful to you in organizing your own book collections.  I'd love to hear about how you organize your books or what other ideas this post may have spurred for you in the comments section below.

If you enjoyed this idea, please consider following me on Twitter or Facebook or Bloglovin' to keep updated on the latest from Dilly Dabbles.


Be sure to check out the many other "Bright Ideas" from other participating bloggers by clicking on the linky images below:


 photo Signature_edited-3_zps050aaea1.png

Saturday, April 12, 2014

Use Clear Labels and Forget the Residue!

Have you ever used address labels around your classroom?  Perhaps you label the front of your cupboards or student cubbies or hooks with labels.  I love labels.  I use the standard address labels to print word problems on to save paper and avoid the time consumption of gluing small papers into notebooks.  I also love to use them around my room, especially for labeling cupboards and coat cubbies.  I've also used them on the front of laminated cards.  The trick I have learned though is the wonder of the clear labels! I still use the standard paper labels for going in student notebooks, but I use clear labels around my room now.  The clear labels are plastic with adhesive on the back, so when you peel them away, they come away clean.  No more scraping paper sticky residue off of your cupboards!  They are also great for overlay on laminated cards.  I like to use them on my numbered hooks for hallway work display.  Any design you wanted to show through would and they just leave a more clean, nice look.  So, get a set of clear labels to have on hand, especially for the summer as you prepare for a new school year next fall.


Thanks to Shelly Gray of Teaching in the Early Years for hosting and organizing this event. 

If you enjoyed this idea, please consider following me on Twitter or Facebook or Bloglovin' to keep updated on the latest from Dilly Dabbles.

I'd love your comments about how you use labels in your classroom. 

Check out all of the other Bright Ideas, 149 others, by clicking on the links under my signature:
 photo Signature_edited-3_zps050aaea1.png


Sunday, March 9, 2014

Using Spotify in the Classroom


I have begun using the music website Spotify in my classroom.  You might liken it to Pandora or even itunes. Like Pandora, you can pay for an upgraded version without ads.  The advantage of Spotify is the ability to choose the songs you want and create your own playlist.  With Pandora, you can choose only a genre or type of music, not the specific songs that are played.

On Spotify, you may follow other users and their playlists, drag and drop songs from a friends playlist into your own, or create your own playlists from scratch.  You can play one song at a time, or play the playlist so your songs will automatically play on to the next one.  You can also set up a song queue so you can play songs from multiple lists or listen before you place them into a playlist.

My district music specialist introduced me to Spotify and has some great playlists that would be a great start for educators.  You can find her page here.  She also has a great musical education blog full of ideas called My Musical Magic.  My Spotify page can be found here, I'm just starting and will continue to grow my own play lists.

I've started using short 1 and 2 minute songs to time students between transitions and to play classical music as students come to class in the morning to start the day off in a calm mood.  I've started playlists of 1 minute and 2 minute songs for timing transitions which you can find on my Spotify page.  You can also find my morning classical playlist.

I found another source for 1 minute songs here as well. Not a Spotify list, but you might find it useful for transition songs.

Give Spotify a try and see how using more music in your classroom can help your students focus.  Not only is is great for transitions and focus, but you'll be able to quickly find songs to integrate into your lessons.  This will save you time and money.  I'm just starting focus on more music (and other art forms) in my lessons.  I'll be sure to share as I use more and more.

I considered creating my own video tutorial for using Spotify, but found this one below that does a great job.  It gives a great overview and some great information to get you started using Spotify.


Be sure to head to the next Bright Idea from Angelia at Extra Special Teaching

Extra Special Teaching

She's sharing tips on Organizing Student Work for Portfolios


Thanks to Shelley of Teaching in the Early Years for organizing the 


Be sure to check the linky below for links to all the "Bright Ideas" this month.

How do you use music in your classroom?  Have a Spotify account and want to share your link?  Feel free to share your ideas and links in the comments. 

 photo Signature_edited-3_zps050aaea1.png


Sunday, February 2, 2014

Making Grading a Little Easier

If you've taken a jumbled pile of papers home to grade, then taken an hour to sort them out by subject and then spent a minute on each paper as you search for the student's name in the roster, then this post is for you.

I've totally been there and I needed a way to lessen the burden, especially the time it took to find each students name on the roster.  This was my solution.


It's a file box with a hanging folder for each student.  Each folder is labeled with numbers that correspond to each student. (That's another tip, number your students.  Yes, that is 33 students in my class.) Students return their homework first thing in the morning right into their folder.  They place them vertically, so they can be easily removed from the folders.


One of the class jobs is the "paper collector" whose job it is to take the papers from the file box, in order, then place the pile in the inbox on my desk.  Here's my inbox.


The bottom box is the inbox and the top is the out box.  Two students in the class have the job of "paper passer" whose job it is to pass back papers I've seen.  ~You can see my current helpers need a little reminding.~

When students pass things in throughout the day, the same routine is followed.  I rarely have a time when everyone in the class is handing something in at the same time because I work with groups most of the day.  When the whole class does need to hand something in, I excuse them by tables while the rest of the class begins to transition to the next activity.

This method keeps student's papers in alphabetical order so that I can quickly find the students on the grade book list.  It also keeps subjects together so I don't have to sort my papers or flip back and forth between subjects as I look at the papers.

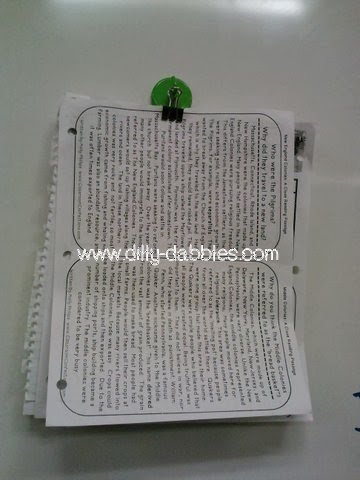
I clip no-name papers to the board with a binder clip that hangs from a hook magnet.  I'm always surprised though at how few of these papers get claimed.  Students who have missing work seem to just prefer to redo the assignment rather than be bothered to look through the stack of nameless work.  I recycle the pile at the end of each quarter.


I hope this tip is helpful to you and alleviates your burden when grading papers.  Be sure to visit Maneuvering the Middle and her post about response systems.
Maneuvering the Middle
 You can check out all the other great ideas in this Bright Ideas blog hop by clicking the links in the linky under this post.  We also have a pinterest page to accompany this hop which can be found here.

Thanks to Shelley from Teaching in the Early Years for hosting and coordinating this event!

 photo Signature_edited-3_zps050aaea1.png

LinkWithin

Related Posts Plugin for WordPress, Blogger...