Showing posts with label Organization. Show all posts

Monday, August 10, 2015

Getting Ready for Back To School - 1


It's the season when school begins to start all over the U.S.  Teachers are back in classrooms getting ready for students, students are awaiting teacher assignments and picking out first day outfits.  Some have already started and are in a week or even two and others have a month yet before returning.  I begin this Thursday, with students' first day on the following Wednesday, August 19.  I've been in my room here and there over the last two weeks to get things organized and set up.  This will leave me with my PD days to plan my lessons and not stress about room readiness.  I feel lucky that of the 4 days of PD that my district gave us this year, only 2 of them contain meetings.  I will have all of Friday to plan, half a day on Monday and half a day on Tuesday.  Our meet the teacher time will be Tuesday afternoon, so everything must be ready by 1:00 pm Tuesday!

I'm planning my next few posts to introduce you to my classroom and how I've prepared for students.  First tip, make sure you're room is welcoming on the outside, not just the inside.  I used the Ecostatic cling white board sheet from shoplet.com on my classroom door to help welcome students to my classroom.  My 11 year old daughter was excited to decorated it for me!  I love that it clings to my door with static electricity, so does my custodian!  Tapes can take the varnish off the doors so it's always a trick as to how to post something welcoming up on the door.  This was perfect.  I will probably still add some bulletin board border around the sheet to spruce it up a bit.  I'll be placing the student desk name tags around the sign for meet the teacher.  Students will take their tag off the door and choose their desk and attach the tag to the one they choose.  We switch desks at the beginning of each month, so they'll only have their chosen seats for the first two weeks.  This time allows me to get to know them and better understand where to seat them in September. It also gives them choice and ownership right off the bat. 

It is a little difficult to smooth out, you can still see a few bubbles there.  It's easy to clean off if you do so right away, but if you leave the dry erase marker on for more than a few hours, you'll need to use the specialty white board cleaner spray to get the marker off.  These will post on any smooth surface, so consider turning your cupboard fronts into whiteboards and windows and doors. These would work great for around the room writing or group work.  They're reusable and you wouldn't have to use and throw away large chart pages that are sometimes very expensive.  

Ecostatic also makes the cling sheets in smaller notecard sizes.  I posted one up on my fridge for reminders.  They might come in handy at school near your desk, but I couldn't really think of a reason I'd use the smaller size at school in place of regular sticky notes.  Perhaps you can think of some ways you might use them. 

Whatever you decide to use to decorate the outside of your room, it's great to have some way to welcome students and families into their new classroom.  They'll be spending a lot of time there, and they want to know it's an inviting and comfortable place to be.  

How do you decorate the outside of your room to welcome students and families? 


Note: shoplet.com sent me the Ecostatic Beginner Kit free to review.  Opinions and my use of the product are my own from my experience with the product.  Links in this post are not affiliate, they only direct to the shoplet.com website. 

Sunday, October 5, 2014

Organizing my Grading

Grading, especially keeping up with it, has been an area in need of improvement for me.  The actual keeping up hasn't gone as well, but the organization has been much better.  It started with this great drawer system I found at Jo-Ann's fabric and craft store on sale over the summer.  It has worked out beautifully to keep my in and out papers organized and out of the way.  The one adjustment I need to make is specifying to the students which direction to hand in papers.  I spend a lot of time turning papers back and forth. I added the two slot bin above for no-name papers and notes that need to go out from the school.


The second thing that has really helped me is using a class list and colored pens in combination.  The class list allows me to quickly go through the papers and record scores to then quickly transfer to our computer grading system.  They're already in alphabetical order, so I can easily enter them in the computer.  I also like having a paper record, technology is great, but there's always a time or two that it fails.


I use the colored pens to help me track which grades have been entered in the computer.  I use a different color every time I grade so I know that at the end of my grading time each day, I just look for all the grades marked in that day's color to enter or change in the computer.  This works really well to keep track of late and missing assignments.  It also helps in the way I grade math homework.  Each homework is worth 2 points.  Students receive 1 point when they hand it in and the second point is given when the homework is correct.  So, using the different colors helps me to know when a grade needs to be changed from a 1 to a 2.

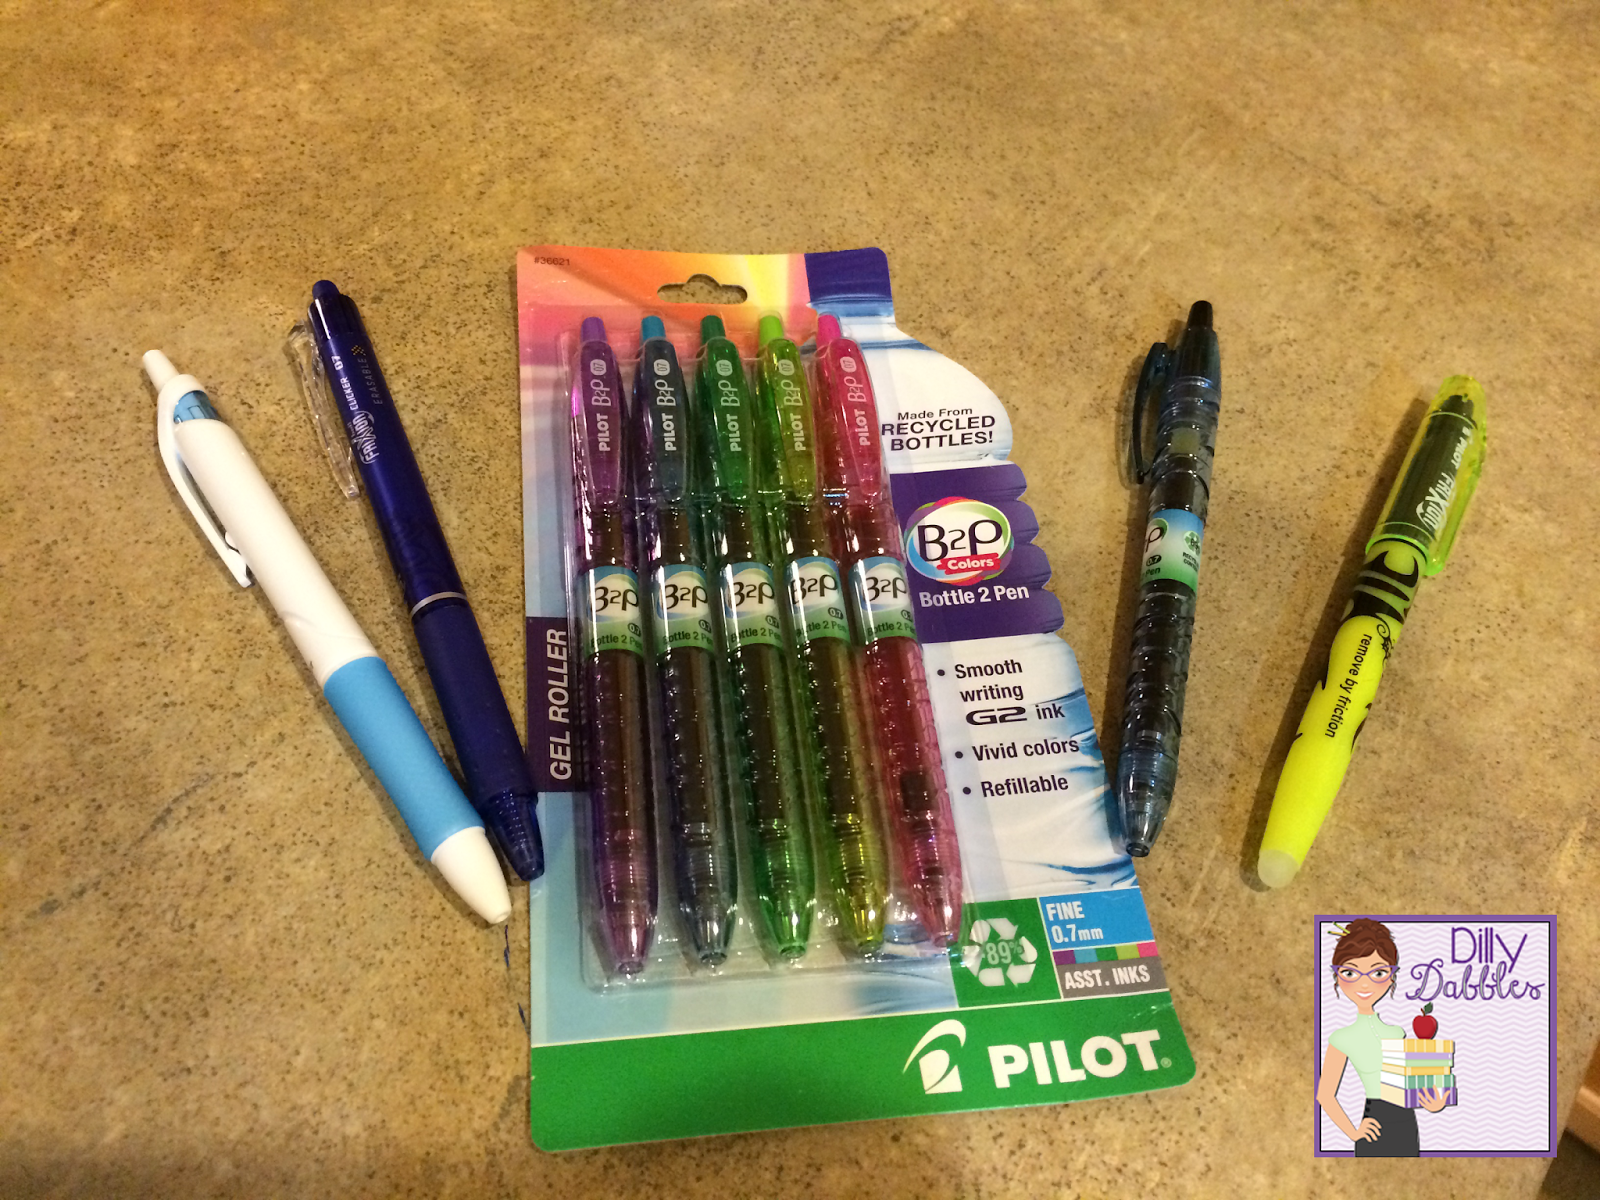
I have really liked these B2P recycled water bottle pens made by Pilot.  I didn't know they came in a variety of colors until receiving this lovely pack.  As you can see in the photo above, the colors are vibrant and I think the pens write very smoothly.  These are gel, which you can get in single colors as well, but the pen also comes in a ballpoint option.  Shoplet sent me these and a few other great pens to use and review a few weeks ago.  I like to use the FriXion pens in my gradebook and when I sew to mark the fabric.  Since the ink disappears with friction or heat, it's perfect to erase easily from my planbook or remove with the iron in my sewing.  The FriXion highlighter would be great to use for close reading.  For writing throughout the day, I do really like the Acroball pen.  I've been using it when I do examples under the document camera.  My students can't see pencil very well under the camera, so I often use pen and this one writes nice and smoothly.


My next step in grading organization is committing to do it everyday so it doesn't pile up for me to do for hours on the weekend.

How do you organize yourself to grade efficiently and keep it all in order? 

Saturday, May 17, 2014

Easily Labeling and Organizing Classroom Books

My last Bright Ideas post was all about using labels in the classroom with a focus on using the clear, plastic coated labels for labeling your room.  Since they are plastic, they don't leave behind a sticky, papery mess when you remove them from your cupboards and shelves.  Today, I'm sharing how I use labels for organizing my classroom books.


I have a few different versions I use, pictured below, but basically I print out a few sheets of each and have them ready for when my book orders arrive.  I format the labels so that each label can be cut in half to get two book labels from each standard size mailing label.  Hopefully you can see how they are cut in the pictures.


For books going into my class library, the labels are just printed with my name.  I cut down the rows of labels, leaving the top in tact so they don't all fall apart.  When it's time to label a book, I simply remove a square, attach to the cover of the book and then refer to my library topic list.  I write in the category number that corresponds to the book genre.  For example, all of my realistic fiction books are numbered with 11.


For books going into my small group collections for guided reading and literature circles, I have labels that include my name, indication that it is a small group set, and then numbers stating that particular book number and how many are in the set.  I usually get 10 books of a title for my small group sets.  I have anywhere from 6-8 in these groups usually.  That leaves one that I designate as the teacher book for me to record my notes and write in and an extra for just in case.


Finally, I label my class set novels.  These are done in a similar fashion as my small group sets, just labled as a class set.  I like to have 35 for a class set.  My largest class size has been 33, this last year, so 35 gives everyone their own copy, ans extra and a teacher copy.  If, heaven forbid, I should have a class size larger than 34, some would just have to share.

With each book numbered for the small group and class sets of books, I can assign each student a book.  This helps with responsibility placed on the students to respect the books and helps me know who to charge or give a consequence to for damage to books.

I hope this will be helpful to you in organizing your own book collections.  I'd love to hear about how you organize your books or what other ideas this post may have spurred for you in the comments section below.

If you enjoyed this idea, please consider following me on Twitter or Facebook or Bloglovin' to keep updated on the latest from Dilly Dabbles.


Be sure to check out the many other "Bright Ideas" from other participating bloggers by clicking on the linky images below:


 photo Signature_edited-3_zps050aaea1.png

Saturday, April 12, 2014

Use Clear Labels and Forget the Residue!

Have you ever used address labels around your classroom?  Perhaps you label the front of your cupboards or student cubbies or hooks with labels.  I love labels.  I use the standard address labels to print word problems on to save paper and avoid the time consumption of gluing small papers into notebooks.  I also love to use them around my room, especially for labeling cupboards and coat cubbies.  I've also used them on the front of laminated cards.  The trick I have learned though is the wonder of the clear labels! I still use the standard paper labels for going in student notebooks, but I use clear labels around my room now.  The clear labels are plastic with adhesive on the back, so when you peel them away, they come away clean.  No more scraping paper sticky residue off of your cupboards!  They are also great for overlay on laminated cards.  I like to use them on my numbered hooks for hallway work display.  Any design you wanted to show through would and they just leave a more clean, nice look.  So, get a set of clear labels to have on hand, especially for the summer as you prepare for a new school year next fall.


Thanks to Shelly Gray of Teaching in the Early Years for hosting and organizing this event. 

If you enjoyed this idea, please consider following me on Twitter or Facebook or Bloglovin' to keep updated on the latest from Dilly Dabbles.

I'd love your comments about how you use labels in your classroom. 

Check out all of the other Bright Ideas, 149 others, by clicking on the links under my signature:
 photo Signature_edited-3_zps050aaea1.png


Sunday, February 2, 2014

Making Grading a Little Easier

If you've taken a jumbled pile of papers home to grade, then taken an hour to sort them out by subject and then spent a minute on each paper as you search for the student's name in the roster, then this post is for you.

I've totally been there and I needed a way to lessen the burden, especially the time it took to find each students name on the roster.  This was my solution.


It's a file box with a hanging folder for each student.  Each folder is labeled with numbers that correspond to each student. (That's another tip, number your students.  Yes, that is 33 students in my class.) Students return their homework first thing in the morning right into their folder.  They place them vertically, so they can be easily removed from the folders.


One of the class jobs is the "paper collector" whose job it is to take the papers from the file box, in order, then place the pile in the inbox on my desk.  Here's my inbox.


The bottom box is the inbox and the top is the out box.  Two students in the class have the job of "paper passer" whose job it is to pass back papers I've seen.  ~You can see my current helpers need a little reminding.~

When students pass things in throughout the day, the same routine is followed.  I rarely have a time when everyone in the class is handing something in at the same time because I work with groups most of the day.  When the whole class does need to hand something in, I excuse them by tables while the rest of the class begins to transition to the next activity.

This method keeps student's papers in alphabetical order so that I can quickly find the students on the grade book list.  It also keeps subjects together so I don't have to sort my papers or flip back and forth between subjects as I look at the papers.

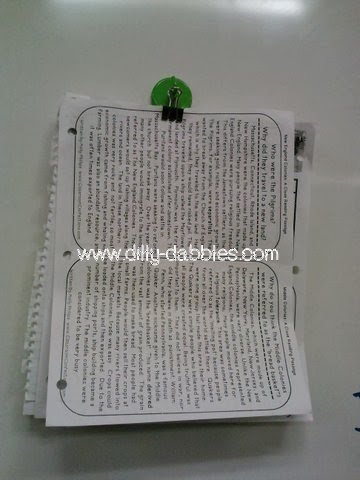
I clip no-name papers to the board with a binder clip that hangs from a hook magnet.  I'm always surprised though at how few of these papers get claimed.  Students who have missing work seem to just prefer to redo the assignment rather than be bothered to look through the stack of nameless work.  I recycle the pile at the end of each quarter.


I hope this tip is helpful to you and alleviates your burden when grading papers.  Be sure to visit Maneuvering the Middle and her post about response systems.
Maneuvering the Middle
 You can check out all the other great ideas in this Bright Ideas blog hop by clicking the links in the linky under this post.  We also have a pinterest page to accompany this hop which can be found here.

Thanks to Shelley from Teaching in the Early Years for hosting and coordinating this event!

 photo Signature_edited-3_zps050aaea1.png

Monday, December 9, 2013

Organizing Task Cards with Folders and Bags

I have been loving all the task cards that I have collected from many great sellers.  Task cards have become a staple to my math instruction, especially the last couple of weeks as I have been trying to figure out how to make guided math / math workshop work for me.  One of the difficulties becomes how to best store all of the cards.  For me, the best way I have found to store them is in 9x12 zippered bags which I then place in file folders in my file drawers according to the concept they match.  The 9" x 12" 4 Mil Clear Zip Lock Bags are a bit heavier than the standard zipper bags you use in your kitchen and even the gallon size bags are just a bit too small to fit a full sized page.  You can get 100 bags on Amazon for under $15, click the picture to be taken directly there.


I like that I can keep the full page cover, instructions, answer sheets and blacklines in the same bag together with the cards.  I simply grab the bag from the file and it is ready to use.  I place them in the center and students have the directions, cards and answers all there at their fingertips.  When it's time to replace with a new concepts, I just file the bag back in the correct folder.
Here they are in the bags and the drawers.


These are regular zip gallon bags because I ran out of the 9x12 bags and needed to get these cards done.  You can see that the bags don't close.  I didn't think to grab some cards in the bigger bags to show you.


I often put the cards on a shower ring.  I find them in the shower curtain section at Walmart.  There are 12 in a bag for less than $3 and they stay together much better than the binder ringers.  The smaller end at the top also makes them easy to grab and carry.

Some of my favorite shops for task cards and projects are:


4mulaFun Blog Fan

For the Love of Teaching Math

An Educator's Life

If you have some great task cards for math to share, be sure to add the link to your blog or TpT store to the linky at the bottom of this post. 

In addition to the great bags I have found to store my task cards in, some other office supplies from Smead have been very helpful. Smead's new file folders and hanging file folders make the organization even easier.  They now have larger tabs so that finding the topic behind located on the folder tab behind all of the bags is so much easier now.  The Smead file folder tabs are a bit taller and longer, you can see the difference in my photos of my file drawer between my older folders and the new Smead ones.  The hanging files now come with tabs attached.  I no longer have to worry about those plastic insertable tabs the I would have to fuss with.  Now the same large tabs are already attached to the hanging folders so they are ready to use right away. Additionally, there's a new Smead expanding pocket I love to use at home.  It's perfect for thowing the bills into so I know where they are when it comes time to pay them.  The new expanding pocket has a "no slip" surface added to the top making it easier to grab and take to my computer.  With the bags and folders, you'll be all set to organize your task cards for easy use in your classroom year after year. 


You can see the light green tabs in this picture as well that are the new tabbed hanging folders.  Soo nice to have them already tabbed!!

Do you have some math task cards or task projects that you love or created and would like to share the link to them, feel free to add it to the linky below.  If you have a post about how you use or organize your task cards, please link those posts as well. 

Note: I was sent the above described promotional products by Smead at no cost in exchange for a blog post review. The use and opinions described above are true and accurate and in no way coerced by Smead or Shoplet / Shoplet UK.


 photo Signature_edited-3_zps050aaea1.png

Thursday, July 18, 2013

Organizing for Reading Groups

Have I told you lately that I love IKEA?  Actually, I don't remember mentioning that on my blog.  Well, I do love IKEA.  I am blessed to have one about 45 minutes away and just a few miles from my parents.  So, I have the opportunity to stop by quite often.

I love the Trofast storage systems.  I have it at my home for my children's toys and I used it in my first grade classroom to organize my math manipulatives.  You can see it in a post I did here.  It's there to the left of the listening center pocket chart.

I didn't need that much storage for math manipulatives in 5th grade, but knew I had to have a Trofast in my classroom.  Well, while perusing IKEA, I stumbled upon this little beauty:


I thought how perfect it would be to organize the books and notebooks and such for my guided reading groups.  So, it came home with me and here it is in my classroom.  I purchased 7 tubs and a package of shelves, they come 2 in a package.  I'm so excited to label each tub and get the caddy full of supplies.  This is going to be so nice to help me keep things organized.

How do you organize for your reading groups?


 photo Signature_edited-3_zps050aaea1.png

Thursday, October 25, 2012

Hallway Display Idea

Pin It


Here's a fun idea for displaying work in the hallway.  Attach string to the wall and then clothespins along the string for quick display of student work.

How do you display student work?

How often do you change what you have displayed?

Friday, March 30, 2012

Storing and Organizing Math Manipulatives

Using and storing math manipulatives can be cumbersome and chaotic.  I wanted my students to have access to the math tools any time they needed them and to be able to choose the tools that they related to and used the best.  I used this storage unit from IKEA for my children and had the thought that it would make the perfect storage for math manipulatives.  Well, it is perfect.  You can get the unit on Amazon, here's the unit I have:
or if you're lucky enough to have an Ikea within driving distance, you can get it a little cheaper and buy directly. Bins in medium and large sizes are also available along with other variations of the shelf unit.  Students can access the tools easily and they can be put away right back where they belong.  Here are some labels you can print out for whatever storage solution you have or come up with.  I just printed them on regular paper and put them on the drawers with clear packing tape.  How do you store your math manipulatives?
 

LinkWithin

Related Posts Plugin for WordPress, Blogger...